
DID WE MISS SOMETHING?
NO PROBLEM
What is a backer board you might ask? A backer board is simply a board that is mounted to the sheetrock behind your track hardware. This is shown in the picture below. These boards are used to create the necessary gap between your door and the trim on your door opening.
If you have trim around your door opening or your studs are not 16” on center, then you will want a backer board. You can either create a backer board out of 1x4 or 1x6 new lumber and paint it the same color as your wall, or request to have us make one to match your door!

Opening Without Trim (right)
If you are hanging your barn door over a sheet-rocked doorway we recommend the door be (4 inches) wider and (2 inches) higher than the opening. If it is a high privacy room such as a bathroom or bedroom we then recommend the door be (6 inches) wider and (2 inches) higher to ensure full coverage and privacy.
Opening With Trim (left)
We recommend that when your door is fully closed that it completely covers the doorway trim. Thus the door width and height
should be the same or greater than the widest and tallest point of your doorway trim.

With Trim
Without Trim
We offer many different floor guide styles depending on the application. The most popular and widely used of these is either a floor mounted or wall mounted fin style guide. This guide rides within a groove in the bottom of your barn door.
For applications where a groove cannot be cut in the bottom of the door a channel guide is used. Both floor and wall mounted versions are available.
All of our doors come double sided, so what you see on the front is what you see on the back. On all of our framed doors, though both sides of the door will be framed and finished the same, the texture selection chosen will be represented on the front side of the door only, leaving the back side with the smooth texture.
Nope! All Signature Woods doors are constructed using professional grade construction methods that are non-warping. Many construction methods prove to warp over time but with extensive testing we have developed a tried and proven method to keep your door looking good and remaining functional for a lifetime.
Our barn doors are as authentic as they come! Unlike many other companies who may fabricate new material to look old, all of our materials are reclaimed from structures that are often over 100 years old! After many stages of processing we then hand craft this beautiful lumber into custom statement pieces for your home.
Normal character marks consist of nail holes, small impressions, wear marks, knots, slight color variations, and saw marks. All original nail holes in our barn doors are filled prior to finishing to ensure no pass-through light or peaking!
With some basic handyman skills and a few common tools, the vast majority of people are able to install the barn doors themselves with little hassle.
Our hand-forged door pulls are meant to be a statement piece on the front of your barn door. Our flush mount handles on the other hand are most often recessed into the backside of your door. This is due to the small amount of space between the backside of your door and the wall. For spaces such as small pantries or closets where you will not be opening the door from the back side you can opt to omit the flush mount handle.
Wood Framed Doors
If you are ordering one of our wood framed barn doors or a track kit by itself, your track kit will come with a standard fin style floor guide. This fin is mounted to the floor and rides in a groove that has already been cut for you in the bottom of your barn door. If you cannot mount the guide to the floor we also have a wall mounted version as well!
Steel-Trimmed Doors
If you are ordering one of our steel-trimmed doors, your track kits will come with a wall mounted system that wedges the door tight to the wall. Though the method changes all floor guides are low-profile and perform the same function.
Definitely not! There is a lot of noisy hardware out there that sound rough and unfriendly to use. Our track kits on the other hand are top of the line and use high-pressure nylon wheels, sealed ball bearings, and rubber bumper stops that all make for a high-functioning, quality, quiet glide. We like to encourage our customers, as a test, to open their new barn door with their little finger just to see how smooth it really is.
Our track kits come with fully adjustable stops so you can adjust your door to start and stop exactly where you need it to! Just use the provided allen wrench to loosen the set-screws, slide the stop to where you want it and then retighten. That's it!
Single Door System
To select the proper track length simply multiply the the barn door width in inches by (2x). Then round the length up to the nearest track length selection.
Ex: If you have a 37" wide barn door you would do the following calculation:
(37in x 2) / 12in = 6.16ft
You would then round up to the 6.5ft kit.
Double Door System
To select the proper track length simply multiply the width in inches of one barn door by (4x). Then round the length up to the nearest track length selection.
Ex: If you have a pair of 34" wide barn doors you would do the following calculation:
(34in x 4) / 12in = 11.33ft
You would then round up to the 12ft kit.
Bypass System
To select the proper track length simply multiply the width in inches of one barn door by (2x). Then round the length up to the nearest track length selection.
Ex: If you have a pair of 34" wide barn doors you would do the following calculation:
(34in x 2) / 12 = 5.66ft
You would then round up to the 6ft kit.
We recommend the following minimum measurements between the top of your door and the ceiling:
Classic / Top Mount / Spade: 6in minimum
Big Wheel: 9in minimum
Bypass Kits: 12in minimum
If you have trim around your door opening or your studs are not 16” on center, then you will want a backer board. You can either create a backer board using a new 1x4 or 1x6 and paint it the same color as your wall, or request to have us make one to match your door finish and texture!
Our hand-forged door pulls are meant to be a statement piece on the front of your barn door. Our flush mount handles on the other hand are most often recessed into the backside of your door. This is due to the small amount of space between the backside of your door and the wall. For spaces such as small pantries or closets where you will not be opening the door from the back side you can opt to omit the flush mount handle.
Our track kits are virtually universal and should work with most doors. Our kits are built to handle barn doors that are 1.5 - 2” in thickness and weight less than 150lbs per section of rail. If your door fall in those two ranges then it will work!
For perfect square or rectangular walls, only a 5% overage is recommended for installation waste. If you are working around angles or difficult obstacles, 10-15% overage is recommended. For color palettes with a variety of widths such as the Artisan Mix or 3-Dimensional Paneling, 10-15% overage will give you some flexibility with your pattern.
Calculating square feet is much easier than you would think! In fact there is a square feet calculator on every wall paneling page to help you calculate how much you need.
But for additional reference follow the steps below:
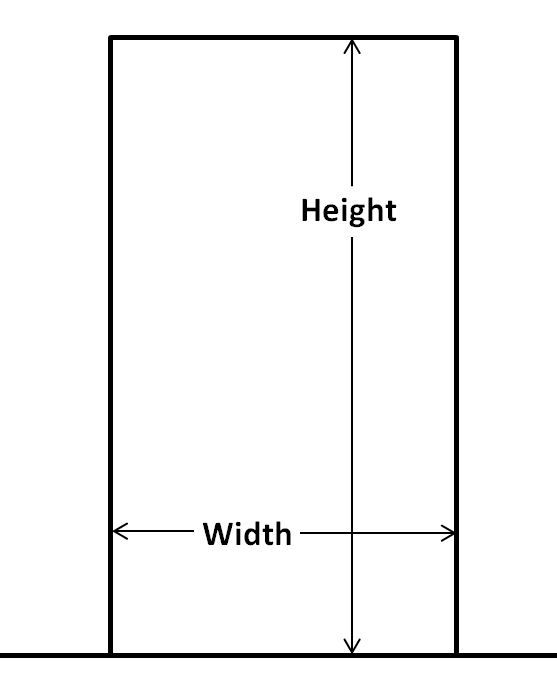
Width (in) x Height (in) =Square Inches
Square Inches / 144 = Square Feet
All of our paneling products come as individual planks milled to a uniform thickness of ¼ inch, and lengths randomized between 1-4 feet. Every plank is trimmed to the specified width based on which color palette you choose. All of our paneling products are ready to install and require no preparation themselves other than final length trimming for your project. Simply open your box and start applying the planks directly to your wall or surface!
Sure thing! Ordering in 10 square foot increments, feel free to mix and match the color varieties until you have met your desired square footage. Keep in mind that if you are mixing different palettes it will be easier to install if they are all the same width (Ex. All 5” or all 4” wide).
Though our paneling is produced out of reclaimed lumber which has spent it's entire life outdoors, we do not recommend or guarantee the longevity of this product when used outdoors.
When choosing a mantel length we suggest that you balance the ends of the mantel between the edge of your firebox and the surround on both sides. Since running mantels the full width of a surround tends to look unbalanced we suggest bringing the length down so the mantel is inside the surround.
Great question! You want to pick a proportionately sized mantel for your space. Large spaces with vaulted ceilings almost always need a large mantel (6x8 or larger). Cozier rooms with shorter ceilings will most likely want a mid-small size mantel (6x6 or 6x8). If you are not sure what size mantel you should choose for your space, feel free to utilize our design services, where we will ask all the right questions and give you our recommendations to pair you with your perfect mantel.
Corbels come in pairs and are a decorative support that is often mounted to bottom of fireplace mantels. You only need corbels if you like the look of them. Generally they are completely aesthetic, are not load bearing, and are installed as separate pieces.
We have done plenty of custom mantel options from surrounds to hearths to mantel-wrapping. If you know what you would like, please email us with pictures and dimensions of your space and we will send you a custom estimate for your project
Check with the manufacturer of your fire box and your local fire codes to see the minimum height restrictions on mounting a mantel above your fireplace.
NO PROBLEM